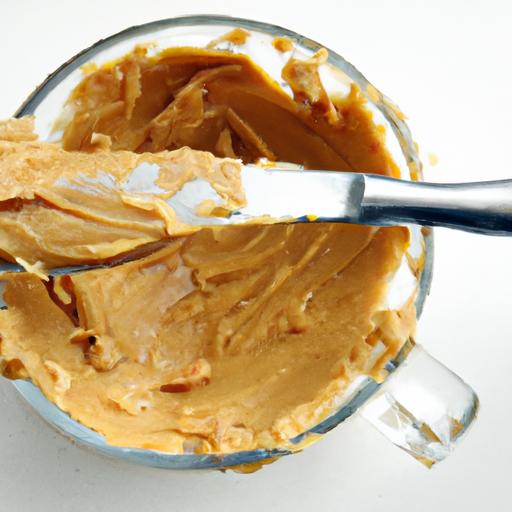
There’s something uniquely satisfying about crafting your own peanut butter-creamy, rich, and bursting with natural flavor straight from the jar. While store-bought varieties offer convenience,homemade peanut butter invites you to savor a purer,customizable delight that’s as wholesome as it is appetizing. In this article, we’ll explore simple recipes and helpful tips to transform roasted peanuts into velvety spreads, empowering you to create your very own kitchen-crafted creamy delights. Whether you prefer classic smoothness, a hint of sweetness, or a dash of spice, get ready to embark on a flavorful journey that proves homemade is truly better.
Crafting the Perfect Texture: Choosing the Right Peanuts for Your Butter
Homemade peanut butter is a kitchen treasure, and unlocking its full potential begins with selecting the right peanuts.Whether you’re aiming for that ultra-smooth spread or a satisfyingly crunchy bite, the choice of peanuts shapes the entire experience. Raw, roasted, salted, or unsalted-each variety tells a different story on your palate, transforming simple nuts into creamy delight.
Prep and Cook Time
- Preparation: 10 minutes
- Processing: 15 minutes
- Total Time: 25 minutes
Yield
Approximately 1 ½ cups of peanut butter, perfect for 6 generous servings.
Difficulty Level
Easy – beginner-amiable with simple equipment.
Ingredients
- 2 cups roasted peanuts (skin removed for smoothness or with skin for a rustic texture)
- 1/2 teaspoon fine sea salt (adjust to taste)
- 1 to 2 tablespoons neutral oil (such as peanut or grapeseed, optional for creamier texture)
- 1 teaspoon raw honey or maple syrup (optional natural sweetener)
- 1/4 teaspoon cinnamon (for a warm, subtle depth)
Instructions
- roast the peanuts (if not already roasted): Preheat your oven to 350°F (175°C). Spread the peanuts in a single layer on a baking sheet and roast for 8-10 minutes until fragrant and lightly golden, stirring once halfway.This enhances their natural oils and flavor.
- Allow peanuts to cool slightly, then place them into a high-powered food processor or blender.
- Pulse and scrape: Process the nuts in 20-second bursts, scraping down the sides frequently to ensure even blending.At first, the peanuts will crumble; then they’ll turn into a gritty sand-like texture.
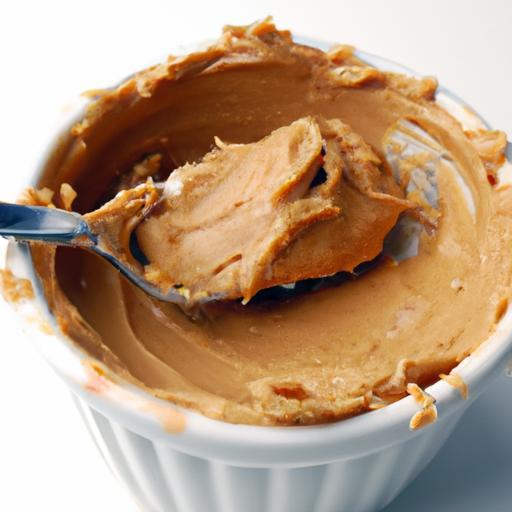
- Continue blending: After about 5 minutes, the mixture will begin to clump together. Pause to add the salt,cinnamon,and honey,then drizzle in oil in a slow stream for that luscious creaminess. Blend to your preferred consistency, whether chunky or silky smooth.
- Once ready, transfer to a clean airtight jar. For added flair, lightly press extra crushed peanuts on top before sealing.
- Storage: Keep your homemade peanut butter in the fridge for up to 3 weeks, stirring before each use if the oils separate naturally.
Chef’s Notes: Tips for success
- Texture control: for crunch, reserve ¼ cup of peanuts to stir in after the butter is creamy.
- Salt level: Start with less salt and adjust to taste after blending-homemade nut butters can always be fine-tuned.
- Natural add-ins: Experiment with a pinch of smoked paprika or a hint of vanilla extract to elevate your peanut butter’s complexity.
- Peanut selection: Opt for fresh, unsalted raw peanuts to fully savor homemade peanut butter’s flavor. Avoid old or rancid nuts for the best taste and safety.
- Make-ahead: Homemade peanut butter keeps well refrigerated; bring to room temperature before spreading for softer, easier use.
Serving suggestions
Spread your freshly crafted peanut butter on toasted artisan bread or swirl into oatmeal for a luxurious breakfast kick. Pair with crisp apple slices and a honey drizzle for an irresistible snack. Garnish with chia seeds or chopped dark chocolate shards to turn simple peanut butter into a gourmet treat.

| Nutritional Info (per 2 tbsp) | Amount |
|---|---|
| Calories | 190 kcal |
| protein | 8 g |
| Carbohydrates | 7 g |
| Fat | 16 g |
For those interested in exploring more nut butters or incorporating peanut butter into delightful breakfast recipes, check out our Healthy Nut butter Recipes. Further insights on peanut nutrition can be discovered through the American Nutrition Association.
Q&A
Q&A: Homemade peanut Butter – Simple Recipes for Creamy delight
Q1: Why make peanut butter at home instead of buying it from the store?
A1: Making peanut butter at home lets you control the ingredients-no hidden sugars, additives, or preservatives. plus, it’s fresher, creamier, and you can customize the flavor exactly how you like it. It’s a fun kitchen experiment with delicious, wholesome results!
Q2: What basic ingredients do I need for homemade peanut butter?
A2: Just two essentials: peanuts and a pinch of salt. from there, you can get creative with honey, cinnamon, or even a touch of coconut oil for extra creaminess.
Q3: What type of peanuts work best for peanut butter?
A3: roasted, unsalted peanuts are ideal. They provide a rich, nutty flavor and the right texture after blending. Though, raw peanuts can work too-you might want to roast them yourself for that golden, toasty taste.
Q4: How do I achieve a smooth and creamy texture?
A4: Patience is key! Blend your peanuts in a high-powered food processor, stopping occasionally to scrape down the sides. Keep blending until the peanuts release their oils and transform from crumbly to luscious, creamy butter. Adding a bit of neutral oil can definitely help smooth things out if needed.
Q5: Can I make crunchy peanut butter at home?
A5: Absolutely! Just reserve some coarsely chopped peanuts and fold them into your creamy batch toward the end of blending.This gives you that satisfying crunch in every bite.
Q6: How long does homemade peanut butter last?
A6: Stored in an airtight container in the fridge, homemade peanut butter can last up to a month. Always use a clean spoon to avoid contamination and give it a stir before each use if separation occurs.
Q7: Are there any variations to try beyond classic peanut butter?
A7: Definitely! Experiment with adding cocoa powder for a chocolate twist, swirl in some maple syrup for sweetness, or blend in a pinch of chili powder for a spicy kick. The possibilities are endless when you’re the peanut butter boss!
Q8: Is homemade peanut butter healthier than store-bought?
A8: Most frequently enough, yes! Store-bought versions can be loaded with sugars, hydrogenated oils, and preservatives. Homemade mains ingredients are just peanuts and a few natural add-ins, making it a clean, nutrient-rich snack.
Q9: Can I make peanut butter without a food processor?
A9: It’s tricky! A food processor or a powerful blender is the best tool for smooth peanut butter. Without one, you’d have to chop and grind peanuts by hand for a very long time, resulting in a chunkier, less creamy spread.
Q10: Any tips for first-time peanut butter makers?
A10: Start with small batches, be patient during blending, and taste as you go. Don’t be afraid to adjust salt and sweetness to your liking. Most importantly, have fun turning simple peanuts into a luscious, homemade delight!
in summary
Whether you crave the velvety smoothness of classic peanut butter or prefer a nutty spread with a touch of cinnamon or honey, making it at home opens a world of delicious possibilities. Beyond the creamy texture and rich flavor, homemade peanut butter offers the satisfaction of knowing exactly what’s inside your jar-a wholesome treat free from unneeded additives. so grab your blender, experiment with thes simple recipes, and transform everyday peanuts into a luscious, homemade delight that elevates breakfasts, snacks, and desserts alike.Your next favorite jar of peanut butter might just be a speedy blend away!