
There’s somthing truly satisfying about making your own almond milk at home-a velvety, creamy blend crafted from simple ingredients, free from additives and hidden preservatives.Whether you’re a seasoned plant-based milk enthusiast or just curious to explore a wholesome option to store-bought options, crafting your own almond milk is easier than you might think. In this guide,we’ll walk you through a straightforward,foolproof recipe to transform humble almonds into a luscious,creamy beverage that’s perfect for everything from morning smoothies to comforting lattes. Get ready to unlock the secrets behind silky homemade almond milk and elevate your kitchen routine with this flavorful, nutritious staple.
Choosing the best Almonds for Rich and Flavorful Milk
When crafting the perfect creamy almond milk, the secret begins with selecting the right almonds. Opt for organic, raw almonds-unroasted and unsalted-to ensure purity and the freshest flavor. Whole almonds with a smooth,unblemished surface yield the richest milk,packed with natural oils that create that luscious mouthfeel everyone craves. Avoid pre-sliced or blanched almonds if possible, as the skins hold vital nutrients and fiber that enhance both taste and health benefits.
soaking Secrets to Unlock Creamy Texture and Nutrients
Soaking is a simple yet transformative step. Soak your almonds for at least 8-12 hours in cool, filtered water to soften them and activate enzymes that improve digestibility and nutrient availability. The longer soak time unlocks a velvet-smooth texture after blending, perfect for silky almond milk. For a pleasant hint of natural sweetness and to reduce any inherent bitterness, add a pinch of sea salt or a splash of vanilla extract to the soaking water.
Once soaked, drain and rinse the almonds thoroughly to wash away tannins that can make your milk taste gritty or astringent.
Blending Techniques That Transform Almonds into Silky Milk
Place your soaked almonds into a high-powered blender with fresh filtered water for the magic to happen. The classic ratio is 1 cup of almonds to 3-4 cups of water, tailored to your desired creaminess. For the smoothest milk, start with less water and add more after blending if needed.
Blend on high speed for 2-3 minutes, or until the mixture becomes emulsified and creamy, almost with a frothy head.A powerful blender crushes almonds into a fine pulp, releasing their natural fats and creating a rich, silky finish. Adding a touch of natural sweetener like maple syrup or a few dates during blending can elevate your milk into a subtly sweet treat perfect for sipping.
Straining Like a Pro Tips for Smoothness and perfect Consistency
Straining is key to smooth, luscious almond milk without a gritty texture. For the best results,use a nut milk bag,fine-mesh sieve,or a doubled layer of cheesecloth to separate the pulp from the liquid.
- Pour the almond blend gradually into your chosen strainer over a large bowl, letting gravity do most of the work.
- Gently squeeze or press the pulp inside the nut milk bag to extract every last drop of creamy milk without pushing too hard-over-squeezing can release bitter notes.
- Save the leftover almond pulp for delicious baking recipes or smoothies-it’s a fantastic fiber boost!
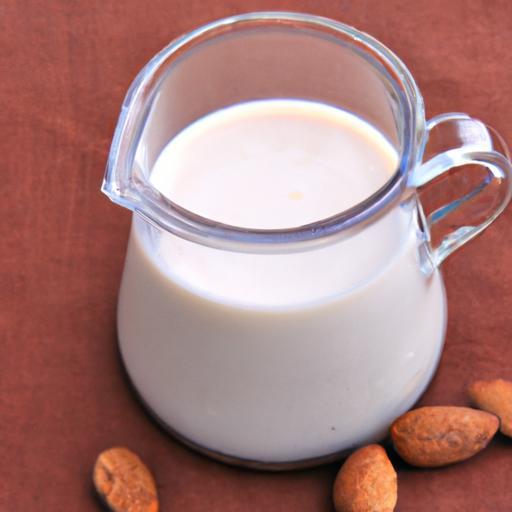
Repeat straining if necessary until you achieve a perfectly smooth texture, then transfer your almond milk to a glass bottle and refrigerate. Shake well before each use, and enjoy the freshest homemade alternative to store-bought versions, brimming with natural richness.

Explore more nut milk recipes | Health benefits of almond milk
Q&A
Q&A: How to Make Creamy Almond Milk at Home – Simple Recipe Guide
Q1: Why shoudl I make almond milk at home rather of buying it from the store?
A1: Homemade almond milk lets you control every ingredient, ensuring it’s fresh, creamy, and free from preservatives, additives, or hidden sugars. Plus, it’s eco-kind – no plastic cartons, no wasted packaging. The taste? Pure, nutty, and infinitely customizable.
Q2: What ingredients do I need to make creamy almond milk?
A2: just three essentials: raw almonds, fresh water, and a pinch of salt. From there,you can add natural sweeteners like dates or honey,and flavor enhancers such as vanilla or cinnamon if you like.Simple pantry staples transform into luscious dairy-free milk!
Q3: How do I get my almond milk extra creamy?
A3: Soaking your almonds overnight (or at least 8 hours) softens them, making them blend into a silky, rich milk. Using a high-powered blender ensures every bit of almond yields its buttery goodness.Also, blending longer helps emulsify the mixture for that velvety texture.
Q4: Do I need special equipment?
A4: Not necessarily! A blender,a nut milk bag (or a thin kitchen towel/cheesecloth),and a bowl are all you need. The nut milk bag strains out the pulp, leaving you with smooth milk. If you’re feeling adventurous,you can even experiment with a fine mesh sieve.
Q5: what should I do with the leftover almond pulp?
A5: Don’t toss that treasure! Almond pulp is packed with fiber and flavor. Dehydrate it for homemade almond flour, stir it into smoothies, bake it into cookies, or toss it in granola. It’s zero waste and packed with nourishment.
Q6: How long does homemade almond milk last?
A6: Keep your homemade almond milk refrigerated in a sealed container, and it should stay fresh for 3-4 days. Always give it a good shake before using, as natural separation occurs without stabilizers.
Q7: Can I customize the flavor of my almond milk?
A7: Absolutely! Sweeten it with maple syrup, dates, or agave. Spice it up with cinnamon, nutmeg, or a splash of vanilla extract. For a decadent twist, try blending in a bit of cocoa powder or a pinch of sea salt.
Q8: Is almond milk nutritious compared to dairy milk?
A8: Almond milk is naturally low in calories and contains healthy fats, vitamin E, and antioxidants. However, unlike fortified store-bought versions, homemade almond milk is lower in protein and calcium, so consider your nutritional needs and balance accordingly.
Q9: Any tips for newbie almond milk makers?
A9: Rinse your almonds well before soaking, don’t skimp on soaking time, and blend thoroughly. Taste as you go – start with less sweetener and add gradually. And remember, practice makes perfect: each batch will get nuttier and creamier as you fine-tune your process.
embrace the creamy,dreamy world of homemade almond milk – your taste buds and health will thank you!
Key Takeaways
Whipping up your own creamy almond milk at home is more than just a recipe-it’s a delightful step toward embracing wholesome,homemade goodness. With just a handful of almonds and a few easy steps, you can customize the richness and flavor to suit your taste, all while skipping the additives found in store-bought cartons. So next time you crave that velvety sip in your morning coffee or a splash in your smoothie, remember: your perfect almond milk is just a blend away. Happy blending, and here’s to nourishing your body and soul, one creamy glass at a time!